Getting Started
This page covers the shortest route to a usable Herald session: install Herald, run demo mode, learn the UI safely with fake mail and demo calendar data, then connect real accounts when you are ready. For every visible screen after launch, continue with Global UI and the tab pages.
Requirements
Section titled “Requirements”- Demo mode requires no mailbox, calendar account, Ollama, or API key
- Real account setup needs a mail account and SMTP settings or a supported OAuth path when you are ready to leave demo mode
- No AI runtime is required for the core app. Mail sync, reading, compose, search, cleanup, Calendar, and settings work without Ollama or cloud model keys.
- Optional after setup: Ollama for local semantic search, classification, chat, quick replies, and AI draft help. External AI providers are opt-in.
- Recommended: a modern terminal with mouse events and OSC 8 hyperlinks for clickable navigation and hardened email links. Common OSC 8-capable terminals include iTerm2, Kitty, WezTerm, GNOME Terminal and other VTE-based terminals, and Windows Terminal; see the full OSC 8 adoption list for current compatibility. For inline image rendering, use a Kitty-protocol terminal such as Ghostty on macOS or Kitty itself; iTerm2 is also supported through its inline image protocol. Other terminals still get safe placeholders or local
open imagelinks when available. - For source builds only: Go 1.25 or newer and a C compiler such as
clangorgccfor SQLite CGO support
macOS with Homebrew
Section titled “macOS with Homebrew”brew tap herald-email/heraldbrew install heraldherald --demo
# When you are ready to connect real accounts:heraldHomebrew installs the primary herald CLI. Use herald mcp for MCP and
herald ssh for SSH mode; the package also includes herald-mcp-server and
herald-ssh-server as compatibility wrappers for older configs and scripts.
Release builds include the Google OAuth defaults used by the recommended Gmail
and Google Calendar setup paths.
Update and upgrade:
brew updatebrew upgrade heraldFor a full tap reset:
brew uninstall heraldbrew untap herald-email/heraldbrew tap herald-email/heraldbrew install heraldNightly builds
Section titled “Nightly builds”Nightly builds are short-lived GitHub Actions artifacts for testing the latest successful main build before the next beta tag. They are not signed releases or Homebrew packages; see Nightly Builds for download steps and channel rules.
Install from source with Go
Section titled “Install from source with Go”go install github.com/herald-email/herald-mail-app/cmd/herald@latestherald --demoThat command installs the primary CLI binary as herald; its mcp and ssh
subcommands replace the older standalone command names for new setups. For a
local checkout:
git clone https://github.com/herald-email/herald-mail-app.gitcd herald-mail-appmake build./bin/herald --demoIf you need Gmail OAuth or Google Calendar OAuth from a source checkout, prepare local OAuth defaults before building or export runtime credentials. See Local OAuth Builds for .herald-dev.env, runtime variables, and release-style local builds.
For development, you can also run:
make runFirst launch
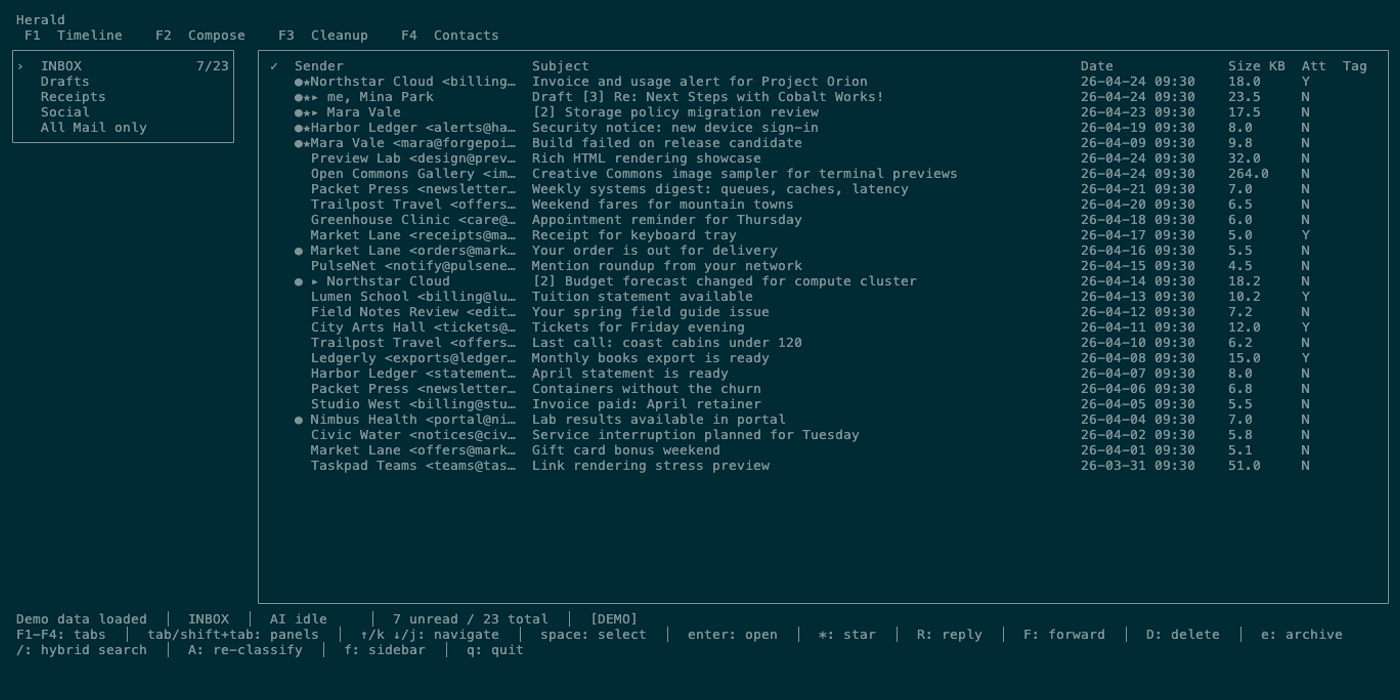
Section titled “First launch”Run herald --demo first to explore a fake inbox and demo calendar without
touching real mail, calendar accounts, Ollama, or API keys. Herald uses
~/.herald/conf.yaml by default; when you run herald without --demo, a
missing or empty config opens the first-run setup wizard.
The wizard recommends Gmail OAuth for Google accounts and can fill IMAP presets for common alternatives, including Gmail App Password, Proton Mail Bridge, Fastmail, iCloud, and Outlook. See First-run Wizard for the screen-by-screen details.
To explore safely before connecting accounts, run herald --demo, press or click 3 Calendar, and try Week, Day, 3-Day, Agenda, Search, Event Detail, and the demo invitation import flow.
Useful flags
Section titled “Useful flags”herald -helpherald -debugherald -verboseherald -config custom.yamlherald --demoUse ./bin/herald --demo instead when trying a source checkout before real
setup, and ./bin/herald when launching that checkout against real accounts.
-debug and -verbose both enable DEBUG-level file logging. Herald does not
write logs to the terminal because that would corrupt the TUI.
Example config
Section titled “Example config”The ollama: block is optional and can be omitted until you enable local AI.
credentials: username: "your@email.com" password: "your-password-or-app-password"server: host: "imap.fastmail.com" port: 993smtp: host: "smtp.fastmail.com" port: 587ollama: host: "http://localhost:11434" model: "gemma3:4b" embedding_model: "nomic-embed-text-v2-moe"Herald warns if the config file is readable by group or other users. Use chmod 600 ~/.herald/conf.yaml for credentials stored in YAML.
Browser terminal option
Section titled “Browser terminal option”Herald can run in a browser tab through ttyd:
brew install ttydttyd -W herald --demoOpen http://localhost:7681. The -W flag is required for keyboard input.
What to read next
Section titled “What to read next”- First 5 Minutes for a short demo-mode loop before the full manual.
- Demo Mode for the safe fake inbox and demo calendar.
- Provider Setup when you are ready to connect real accounts.
- Timeline for the default inbox workflow.
- Calendar for the schedule workspace, demo calendar, and invitation import flow.
- All Keybindings for a compact command table.